
Art time with small children is not my forte. I tend to turn into an ogress when surrounded by paint splatters, spilled cups, and finely shredded paper glued to the table. The twins never painted until they started at a Montessori preschool right before their fourth birthday. Over the past two years art project ideas and motivation from A Year of Playing Skillfully have helped us all. With practice the kids are much better at not eating the art supplies. I’m much better at letting them explore and create. Smocks from IKEA and $2 wipeable plastic tablecloths with picnic clips holding them down also help keep my panic in check.
These days the kids may use crayons, colored pencils, paper, and coloring pages upon request. I try to set up more organized (i.e. highly supervised to prevent disastrous mess) art projects once a week. This week we made marbled paper again. The steps are simple and the project can be made with household supplies.
1) Spray a large baking pan with shaving cream. If you like, let the kids use it for sensory play or letter writing for a while. Smooth each pan until you have a flat even surface. Use medicine droppers to drip liquid watercolors (food coloring also works) over the shaving cream.
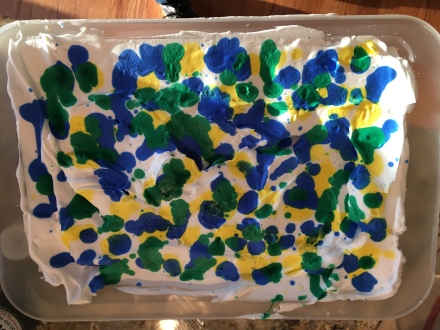
2) Use the pointy tip of a knife to draw vertical and horizontal lines through the shaving cream. Younger kids do best with straight lines. Kids with better fine motor control to keep the tip pointed might want to experiment with circles and waves.

Don’t overmix or draw with too broad an edge or the colors will blend and you’ll lose a lot of the distinctive marbling. I didn’t catch this child in time and you can see that the patterns are less distinct on the paper (though she had a grand time stirring).

3) Press a piece of watercolor paper or heavy card stock evenly into the shaving cream. I also think individual index cards would be nice. They could be used as Valentines or Easter cards. Give the paper a few seconds to pick up the paint.
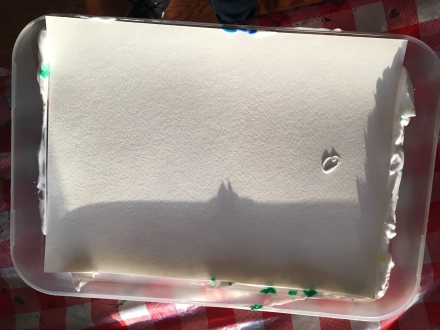
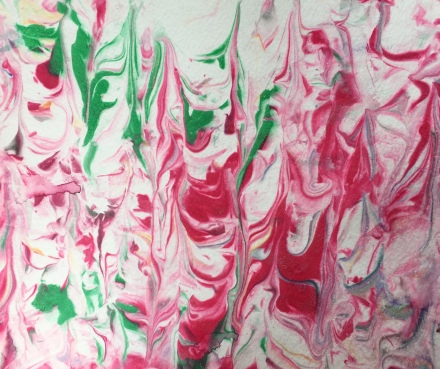
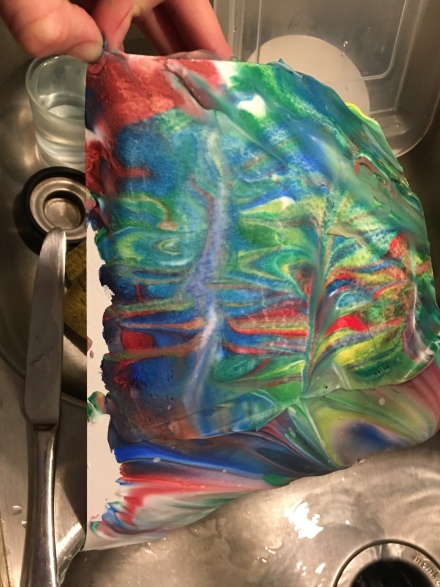
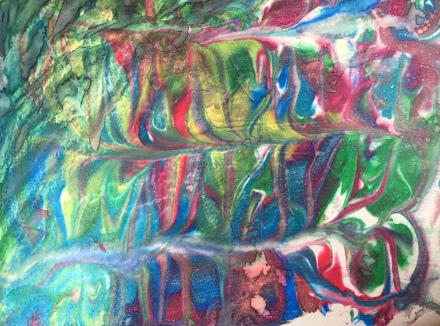
4) Scrape the shaving cream off the paper with a long knife or cake froster. Here you can see what a page looks like freshly lifted from the pan:

…and then the pattern emerging underneath as I start scraping away the shaving cream.
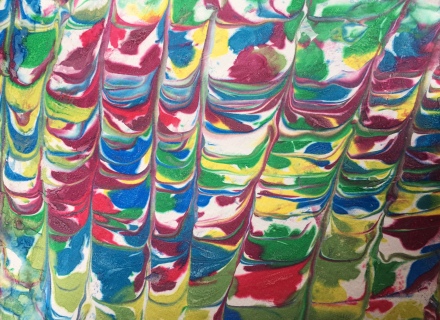
4) Set the paper out to dry. You can pin down the corners to prevent curling if you like.

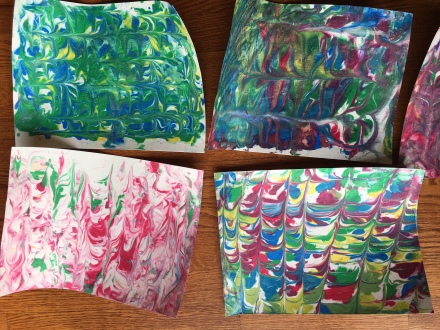
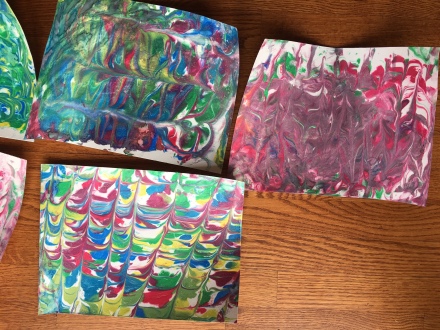
Last year I cut the kids’ pages into hearts and strung them up as Valentines garlands (goodness knows we need some color in the white and gray days of February!). This year we’ll probably use the pages as cards or for other purposes.
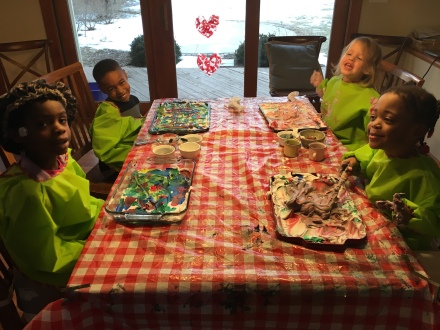
For the most part the kids (6, 6, 4, and 3) handled smoothing the cream, dripping in the paint, and drawing the marbling lines. I helped them press the paper down evenly. I scraped away the shaving cream for them just to keep the mess down.
